
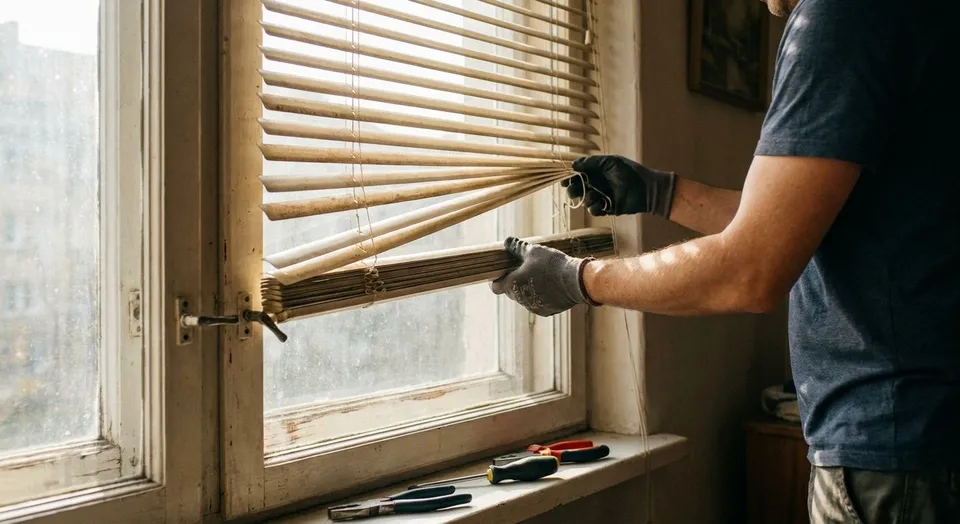
Removing old blinds before installation is a two-screw job on most windows, not a demolition project: release the headrail from its bracket, then pull the bracket itself if the new blinds use a different mount type. The step people skip is checking whether the old brackets sit inside the window frame or outside it, and that single detail determines whether the job takes five minutes or twenty.
- How to remove old blinds comes down to releasing two screws per bracket, then pulling the headrail free.
- Inside-mount and outside-mount brackets release differently, so check which one is on the window first.
- Painted-over or stripped screws are the main reason a five-minute job stretches to twenty.
- Rainier Blinds crews remove old blinds as part of installation across the Greater Seattle Area, no separate appointment needed.
Why removing old blinds correctly matters
A rushed removal cracks drywall, strips screw holes, or leaves a hold-down bracket screwed into the window sash instead of the frame. Any of those turn a simple swap into a patch-and-repaint job before the new blinds go up.
Matching the removal method to the mount type also matters for reinstallation. New brackets don't always land in the same holes as the old ones, especially when switching from a mini blind to a roller shade or cellular shade headrail, so knowing what you're taking down shapes what goes back up.
How Do You Remove Old Blinds Before Installation?
Most residential blinds come down in five steps regardless of style. Tilt or raise the blind fully first so the slats or cellular fabric aren't hanging loose while you work.
- Locate the mounting brackets. They sit at the top corners of the headrail, either inside the window frame (inside mount) or on the wall/trim above it (outside mount).
- Release the headrail from the bracket. Most brackets have a spring clip or a small lever, press it and tilt the headrail forward and down.
- Remove the mounting screws. Standard brackets use two screws each; a Phillips-head screwdriver handles nearly all residential hardware.
- Pull any hold-down brackets at the bottom. These are common on outdoor shades, sliding door verticals, and blinds installed in high-traffic areas.
- Patch the screw holes if the new blinds use a different mount pattern, before measuring for the replacement.
Inside-Mount Blinds
Inside-mount brackets are recessed into the window frame, so you're working in a tighter space. Support the headrail with one hand before backing out the screws. Unsupported headrails on wider windows can twist and gouge the frame on the way down.
Outside-Mount Blinds
Outside-mount brackets sit on the wall or trim, giving more room to work but often more screws to track, especially on wider spans that use a center support bracket. Remove the center bracket last so the headrail stays supported while you clear the end brackets.
Vertical Blinds and Sliding Door Tracks
Vertical blind headrails on sliding glass doors usually mount with a continuous track and end brackets rather than a simple two-screw bracket. Detach the vanes from the carrier first, then release the track the same way as a standard headrail, two to four screws depending on the door width.
Skip the removal guesswork
Rainier Blinds crews remove old blinds and install new ones in the same visit.
Why removal takes longer than expected
The five-step process above assumes clean hardware and clear access. These factors stretch the job:
- Painted-over screws: common in older Pacific Northwest homes where trim got repainted without removing hardware first.
- Stripped screw heads from repeated removals over the years, which need a screw extractor or a drill-out.
- Hold-down brackets anchored into the window sash instead of the frame, which risks cracking the sash if forced.
- Corroded screws on blinds that have been up for a decade or more, especially in humid rooms like bathrooms and kitchens.
- Multiple headrails ganged together on wide window walls, which need to come down as a unit to avoid dropping one section.
- Broken lift cords or tangled mechanisms that make the headrail hang unevenly. Check our guide on fixing a broken blind if the old blind is jammed rather than simply outdated.
Removing old blinds takes two screws per bracket and roughly five minutes once you've confirmed the mount type. The delays almost always come from hardware, not the design.
Do I need to remove the brackets, or just the headrail?
Remove the brackets too if the new blinds use a different mount type or a wider bracket footprint, which is common when moving from a slim mini blind to a cellular or roller shade headrail in 2026. Leaving mismatched brackets in place forces the installer to work around visible screw holes, which shows on the finished window.
Can I reuse the old mounting brackets for new blinds?
Reusing old brackets works only when the new blinds share the same headrail depth and screw spacing as the old ones, which is uncommon across different product categories. Most professional installs in 2026 replace the brackets outright since custom shades and cellular blinds use headrail profiles that don't match legacy mini-blind hardware.
What do I do if the screws are stripped or painted over?
Stripped screws need a rubber band trick first, press a wide rubber band over the screw head and turn slowly, which often restores enough grip to back it out. Painted-over screws usually need a utility knife to score the paint seam around the head before the screwdriver bites; skipping this step is the top reason DIY removals in older Auburn and Tacoma-area homes take longer than planned.
FAQ
How long does it take to remove old blinds?
Removing old blinds takes about five minutes per window once the mount type is confirmed, longer if screws are painted over or corroded. Wide windows with center support brackets or ganged headrails add a few extra minutes per section.
Do I need special tools to remove old blinds?
A Phillips-head screwdriver handles nearly all residential blind brackets in 2026. A screw extractor or a rubber band grip trick helps with stripped screws, and a utility knife clears paint seams on older trim.
Should I remove old blinds before or after measuring for new ones?
Measure the window opening before removing old blinds whenever possible, since the old hardware can obscure trim gaps or frame irregularities. If the old blinds block accurate measurements, remove them first and measure the bare opening.
Can I remove blinds without damaging the window frame?
Yes, supporting the headrail with one hand while backing out screws prevents the twisting motion that gouges frames, especially on inside-mount brackets. Removing the center bracket last on wide spans keeps the headrail stable throughout.
What's the difference between removing inside-mount and outside-mount blinds?
Inside-mount blinds recess into the window frame with less working room, while outside-mount blinds sit on the wall or trim with easier access but sometimes more brackets to track. Both use the same two-screw-per-bracket release once you've identified which type is installed.
Will removing old blinds damage my walls?
Removing old blinds rarely damages walls when screws back out cleanly, but stripped or forced screws can chip trim or drywall around the bracket. Patch any leftover holes before new brackets go up if the mount pattern differs.
Can I leave the old brackets up for new blinds?
Old brackets stay useful only if the new blinds share the same headrail depth and screw spacing, which is uncommon when switching product categories. Most 2026 installations replace brackets to match the new headrail exactly.
One last thing
The part homeowners skip most often is checking the bottom of the window for a hold-down bracket before starting on the top. Outdoor shades, sliding door verticals, and blinds in high-traffic rooms almost always have one, and missing it means the headrail comes loose at the top while the bottom stays anchored. Clear both ends before you pull anything free.