
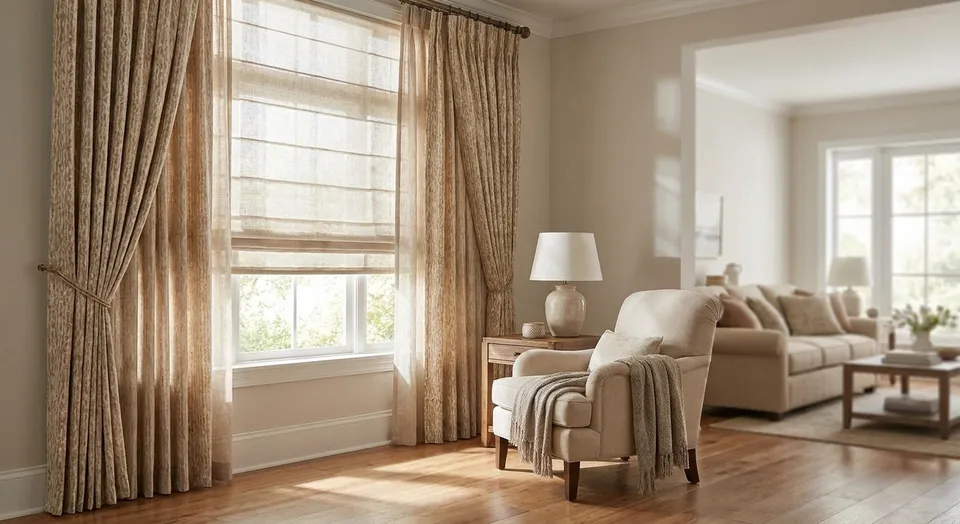
Layering shades and drapery in a living room means picking a functional layer for light and privacy, then a decorative layer for texture and depth, and mounting both correctly so neither jams the other. Get the order wrong and the drapery blocks the shade's motor, or the shade rail shows below the drapery hem.
- Layer roller or cellular shades inside the window frame, then hang drapery outside it on a separate rod.
- Mount drapery rods 4-6 inches above the window frame so panels clear the shade headrail.
- Roman shades pair well with drapery in 2026 living rooms when the shade sits flush and drapery stacks off to the side.
- Skip layering two heavy blackout treatments on one window. Pick one blackout layer and one light-filtering layer.
- Drapery measured and installed by Rainier Blinds is positioned to clear the shade hardware, which off-the-shelf panels rarely do.
Why this matters
A single window treatment in a living room does one job. Block light, or add softness, but rarely both. Layering fixes that split. The shade handles privacy and glare throughout the day; the drapery handles the room's finished look at night and adds a fabric layer that a hard shade can't.
The mistake most homeowners make in 2026 is buying the drapery first and the shade second, without checking clearance. A rod hung too close to a roller shade headrail will catch the fabric every time the shade cycles. Plan the shade's mount type before the drapery goes on the wall.
What you'll need
- Tape measure and a level
- One functional layer: roller shades, cellular shades, zebra shades, or roman shades
- One decorative layer: drapery panels on a separate rod
- Inside-mount or outside-mount brackets, matched to the window depth
- A drapery rod rated for the panel weight (heavier linen or blackout-lined panels need a sturdier rod)
- 30-45 minutes per window for measuring and marking bracket positions
If the functional layer is going to be custom drapery panels paired with a shade, measure both layers together before ordering either one. Ordering them separately is the single most common reason a layered setup doesn't clear properly.
The steps
1. Pick the functional layer first
The shade does the daily work, privacy at night, glare control in the afternoon, so choose it based on light exposure, not looks. West-facing living rooms in the Puget Sound area do better with a light-filtering roller shade or a zebra shade that can shift between sheer and closed. South King County living rooms with big picture windows often need a cellular shade for the insulation value on top of the light control.
Mount this layer inside the window frame whenever the frame is deep enough. Inside mount keeps the headrail tucked back, which is exactly the clearance you need for drapery later. Common mistake: choosing outside mount for the shade because it looks fuller, then finding the drapery rod has nowhere to sit without overlapping the shade.
2. Choose the drapery layer for contrast, not matching
Drapery in a layered setup should contrast the shade in texture, not repeat it. A smooth roller shade pairs well with a heavier woven or linen drapery panel. A textured zebra shade, like the dual-layered zebra shades option, pairs better with a simpler, flatter drapery fabric so the room doesn't read busy.
Pick drapery weight based on the room's actual use. A living room used for movie nights wants a heavier, lined panel that adds real light control. A living room that's mostly daytime space wants a lighter fabric that stacks back cleanly and doesn't overpower the window.
3. Measure and mark the drapery rod height
Mount the drapery rod 4-6 inches above the top of the window frame, not the top of the shade headrail. This gives the panels enough height to fall past the headrail without bunching. Going higher than 6 inches on a standard 8-foot ceiling starts to look disconnected from the window; going lower risks the rod visually competing with the shade.
Extend the rod 3 inches beyond each side of the frame at minimum, more if the panels need to stack fully open during the day. Common mistake: matching the rod width to the window width exactly, which leaves no room for the panels to clear the glass when open and blocks light even with the drapery pulled back.
4. Confirm shade clearance before drilling
Before any bracket goes into the wall, hold the drapery rod at the marked height and check it clears the shade headrail by at least 1-2 inches. This step gets skipped constantly because it feels redundant after measuring. It isn't. Headrail depth varies by shade type: a cellular shade headrail sits shallower than a roman shade's mounting board, which changes how close the drapery rod can sit.
If you're layering a roman shade, check the fabric selection and mounting depth together, since roman shade hardware projects further off the wall than a roller shade does.
5. Install the functional layer first
Mount the shade before the drapery rod goes up. This order matters because the shade's bracket position tells you exactly where the drapery rod has clearance, rather than guessing from a tape measure alone. Test the shade's full range of motion, up, down, and any tilt or shift function, before touching the drapery hardware.
Common mistake: installing drapery first because it's the more visible layer, then discovering the shade brackets need to sit closer to the glass than planned, which throws off the rod height already marked on the wall.
6. Install and dress the drapery layer
Hang the panels, then dress them by hand. Pull the folds into even columns and let the fabric set for 24-48 hours before final adjustment. Fabric relaxes after hanging, and panels that look tight on day one often stack more naturally by day three.
Check the finished look with the shade both up and down. A layered treatment should look intentional in both states, not just when the shade is closed and hidden.
Get shade and drapery clearance right the first time
Rainier Blinds measures both layers together so nothing snags in 2026 or beyond.
Troubleshooting
- Drapery snags the shade every time it cycles. The rod sits too close to the headrail. Re-mount the rod 1-2 inches further from the wall, or raise it slightly if ceiling height allows.
- Panels look uneven after a week. Fabric hasn't finished relaxing, or the rod isn't level. Recheck with a level before assuming it's a fabric defect.
- Room feels heavy or dark even with the shade up. Two blackout-weight layers stacked on one window. Swap one layer to a light-filtering fabric.
- Shade headrail shows below the drapery hem. Drapery length was measured to the floor without accounting for the shade sitting slightly forward. Measure both layers installed, not on paper.
- Motorized shade remote loses range near the drapery. Heavy lined panels can block signal on some motorized shades. Reposition the hub or check the mount type for the shade to see if outside mount improves clearance and signal path.
Tools and resources
- Tape measure, level, pencil, stud finder
- Drill and rod brackets rated for panel weight
- A second person to hold the rod during height checks. This step is nearly impossible solo on wide windows
- Reference the mount type guide before ordering brackets for either layer
What to do next
Once the layering plan is set, the fabric decision is what determines whether the room looks finished or thrown together. Roman shades add the most texture of any functional layer when paired with drapery, and picking the wrong weight there undoes the whole plan.
FAQ
What's the best order to layer shades and drapery in a living room?
Install the functional shade first, then the drapery. The shade's bracket position determines exact clearance for the drapery rod, which prevents snagging once both layers are up in 2026 living rooms.
How high should a drapery rod be mounted above a shade?
Mount the rod 4-6 inches above the window frame, giving at least 1-2 inches of clearance past the shade headrail. Going higher than 6 inches on standard ceilings starts to look disconnected from the window.
Can you layer roman shades with drapery panels?
Yes, roman shades layer well with drapery because the folded fabric adds texture a flat roller shade doesn't. Check the roman shade's mounting board depth first, since it projects further off the wall than most shade types.
Is it better to layer two shades or a shade with drapery?
A shade with drapery gives more contrast and a finished look than two shades stacked together. Dual shade setups, like layered zebra shades, work well alone but add less texture than a fabric drapery layer.
Do blackout shades and blackout drapery work together?
Stacking two full blackout layers on one window usually makes a living room feel heavier than intended. Pair one blackout layer with a light-filtering layer instead, unless the room is a dedicated media space.
What drapery width works with a layered shade setup?
Extend the rod at least 3 inches beyond each side of the window frame so panels stack fully open without blocking the glass. Wider stacking room matters more in living rooms with heavy daytime light needs.
Does motorized shade hardware affect drapery layering?
Motorized headrails can sit slightly deeper than manual ones, which changes drapery rod clearance. Confirm the motorized shade's mounted depth before finalizing the drapery rod height.
How long should you wait before adjusting drapery after installing?
Let drapery panels hang for 24-48 hours before final adjustments. Fabric relaxes after installation, and folds that look tight on day one often settle naturally within a few days.
One last thing
The clearance problem almost never shows up in the showroom. It shows up three days after installation, once the drapery fabric relaxes and settles closer to the shade than it looked on day one. Measure both layers installed together, not on paper, and recheck clearance after the fabric sets, not just on install day.